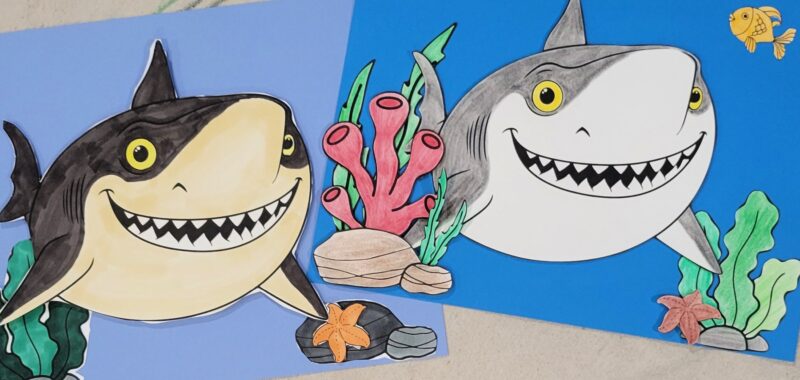
Kids use a simple underwater scene and foam stickers to create a fun dimensional project while learning the three different “grounds” in art. We’ve included a free printable to make this project easy for learning at home or in the classroom.

Exploring Grounds with an Underwater Scene
Many times artists will use 3 grounds within their artwork: background, middle ground, and foreground. In this project, kids will use shapes and foam stickers to create various grounds.
What are the Three “Grounds” in art?
- Background: elements that appear furthest from the viewer, or behind everything else within the picture.
- Foreground: elements in the picture that appear closest to the viewer.
- Middle Ground: elements in the picture that appear to be placed between the background and foreground.
Related: You may also enjoy our Underwater Scene Wax Resist Project
Supplies Needed for this Dimensional Underwater Scene Art Project

- Free Download (see below) – printed on cardstock
- Blue Cardstock
- Double Sided Foam Tape or Stickers
- Glue
- Scissors
- Coloring medium of your choice – Crayons, Markers, Colored Pencils, etc.
Download the Underwater Scene Printable Here
Using printable images saves kids time from drawing their own scene. The extra time will allow more focus on coloring, cutting, and layering to create their finished masterpiece.
Directions to Make This Dimensional Underwater Scene Art Project for Kids
Step 1

Have kids color the images on the free printable pages using any art medium.
If not using the free printable, simply have kids draw and color their own designs on cardstock.
Step 2

Cut out shapes from the colored printable.
Step 3

Place cut out shapes onto the background page to determine desired placement.
Step 4

Attach shapes by layering glue and foam tape to create different layers within the project.
- Background: glue shapes directly to background page
- Middle Ground: Use one layer of foam tape to slightly bring shapes forward. This will create the middle layer of the project.
- Foreground: Use two layers of foam tape to bring these shapes further to the front, creating the foreground of the picture.
Finished Underwater Scene Dimensional Art Project

I love how these projects turn out differently even though everyone works from the same instructions. Since the completed projects are created on paper they can easily hang by using clips, magnets, or your favorite displaying method.
Our Experience Making the Underwater Scene Dimensional Art Project
My students love to make this project because it is fun to see the designs popping out of the page. I love all of the unique ideas and placements that the kids create. While they may use the same printable, each project displays the artist’s own individual style. This is a lesson that I repeat throughout the years with my classes because it is always a success.
Dimensional Art Variations
- Use other mediums to complete the project. This may add time to the project if you have to wait for mediums (such as paint) to dry.
- Help younger kids complete this project by assisting them in cutting the shapes.
- Use white cardstock for the background and have kids color it in themselves.
- Consider different scenes such as outer space or a forest.
- For a group project: Have each kid write an idea for a background, middle ground, and foreground on 3 separate slips of paper. Keeping the “grounds” separate, shuffle slips of paper. Each kid draws a new slip from each “grounds” stack. Kids then combine those ideas to form a new picture.
Prep Time
5 minutes
Active Time
30 minutes
Total Time
35 minutes
Difficulty
Medium
Estimated Cost
$5
Materials
- Free Download – printed on cardstock
- Blue Cardstock
- Coloring medium of your choice – Crayons, Markers, Colored Pencils, etc.
- Double Sided Foam Tape or Stickers
- Glue
Instructions
- Have kids color the images on the free printable pages using any art medium. If not using the free printable, simply have kids draw and color their own designs on cardstock.
- Cut out shapes from the colored printable.
- Place cut out shapes onto the background page to determine desired placement.
- Attach shapes by layering glue and foam tape to create different layers within the project.
- Background: glue shapes directly to background page
- Middle Ground: Use one layer of foam tape to slightly bring shapes forward. This will create the middle layer of the project.
- Foreground: Use two layers of foam tape to bring these shapes further to the front, creating the foreground of the picture.
Other fun Shark Projects from Kids Activities Blog
What medium did your kids use to complete this project? Did they use the printable images or create their own design?

